How to Get Rid of Bees from a Ceiling
Removing a bee hive can be dangerous. Most stinging insects will defend their hive from perceived threats. At Trutech, we use bee-vacs when feasible to safely remove the bees before getting rid of the hive. Occasionally, a bee colony will abandon a hive. Reasons include lack of food or water, parasite or disease infestation, frequent disturbance by humans or animals, weather changes, poor ventilation, or problems with the queen.
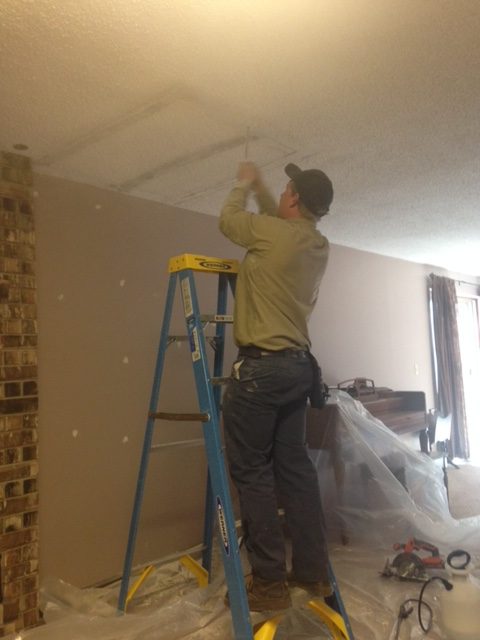
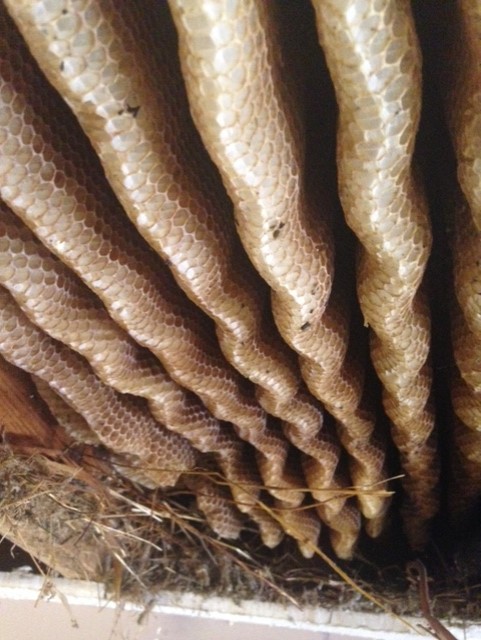
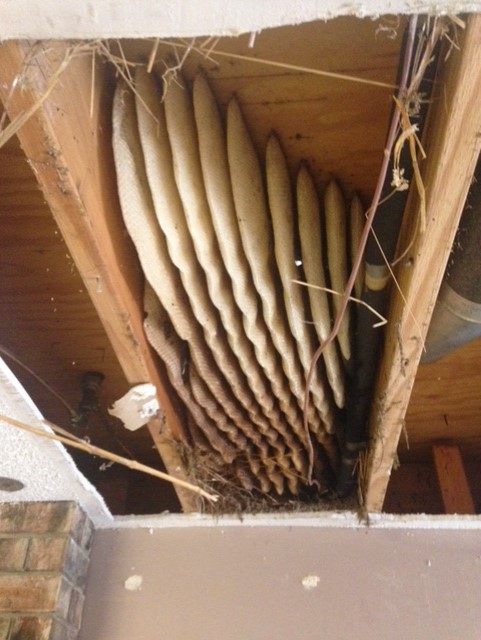
Fortunately for this homeowner in St. Joseph, the beehive was abandoned.
Materials need:
- Ladder
- Gloves
- Saw
- Hammer
- Nails
- Screw Driver
- Screws
- Plywood
- Paint Chisel

Step 1: Identify Location
You need to identify where the hive is inside the house. If you have a beehive somewhere in your house, you might notice unexpected or unusual bee activity. That could mean noticing more bees or bees where they usually are not present. If a hive is inside your wall or ceiling, you typically will hear a loud buzzing noise from the concentration of bees. You can also use dark spots to identify the location of the hive. The dark spots are from the honey.

Step 2: Start Cutting
You need to identify where the hive is inside the house. If you have a beehive somewhere in your house, you might notice unexpected or unusual bee activity. That could mean noticing more bees or bees where they usually are not present. If a hive is inside your wall or ceiling, you typically will hear a loud buzzing noise from the concentration of bees. You can also use dark spots to identify the location of the hive. The dark spots are from the honey.

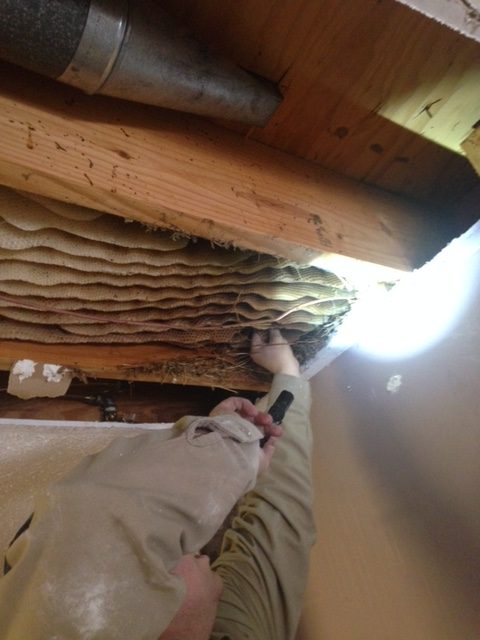
Step 3: Expose the Entire HIve
Expose the entire bee hive before you attempt to remove it. Once the entire comb is exposed, start removing it. You should be able to gently pull all of it out. A paint chisel can help.

Step 4: Clean Up
You need to make sure to clean all of the honey residue. Soapy water works well, but it can be messy work. After the comb is removed, wash the area with either ammonia or bleach to remove the pheromones the bees have put on the wood and in the wax left in the wood. The removal of these pheromones reduces the potential for attracting bees. The ceiling is then replaced, and the hole the bees used to enter is closed.
Old beehives might seem harmless. The old honey combs can attract other pests like cockroaches, mice, and raccoons. In some cases, another bee colony can take residence in the abandoned hive!
At Trutech Wildlife Service, we repair the physical damage caused by animals every day. We have the experience to remove the beehive with minimal damage to your house, and the skill to repair the damage.
- https://xerces.org/blog/5-ways-to-increase-nesting-habitat-for-bees
- https://www.clemson.edu/extension/beekeepers/fact-sheets-publications/honey-bee-colony-removal.html
- https://www.lsu.edu/entomology/docs/pub2874removingbees.pdf
- https://ucanr.edu/blogs/blogcore/postdetail.cfm?postnum=30352#:~:text=In%20this%20case%2C%20all%20bees,or%20problems%20with%20the%20queen.


